Step 1 - open DXF CAD file / or you can draw

ut2D opens DXF CAD vector graphic design.
Open or import is possible, DXF, EPS, AI & PDFsúbory
The project can be designed and drawn directly Cut2D.
Numerous proposals can be combined.
Structural changes or modifications can be exported as a DXF or EPS / AI file for use in other software.
Step 2 Check the size, XY, edit and add text

In the left pane are tools for creating, drawing, vector, type text, listing, closing curves, rotation of the centering.
Check the size and location of the object to coordinate and desktop.
Adapt the design to the exact size ready for cutting.
Open curve close as possible to fill them.
Delete double lines, could cause problems during operation.
Add text
Align objects
You can copy, paste, rotate or mirror image do
Measure the size / distance between objects.
Objects that require the same toolpath operations can be grouped for easy selection.
Modified designs can be exported as a DXF or EPS for use in other software.
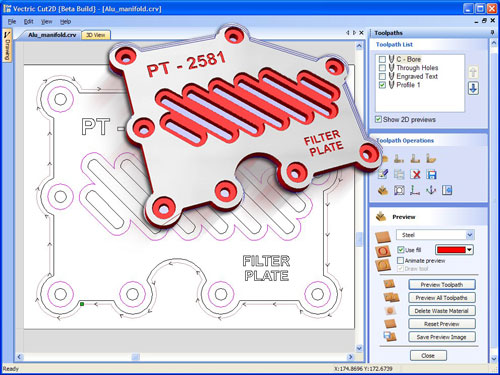
Step 3 - calculate the toolpath
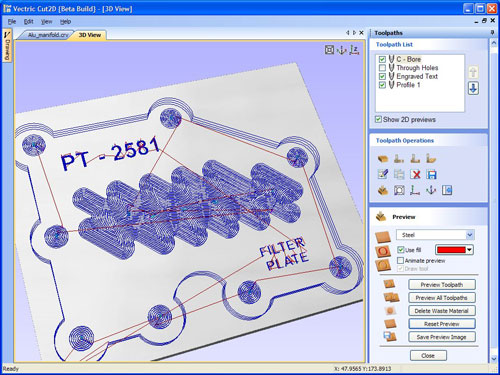
In the right pane are tools for creating tracks and display the finished product. Simply select the required profiles and calculate the machining path. Cut2D a tray of instruments and automatically compensated engraving path with respect to the diameter and shape of the instrument. You can add more tools with defined rozmermy.
Certainly more depth of cut for each curve
Select the tool and check its parameters, whether they are suitable for the material.
Number of steps in the depth Z
cutting speed
spindle speed
Calculate toolpath
Zmeniť toolpath is possible to simply release the mouse and pressing tool path and its icon, make changes and prepočítavanie.Nová tool path is immediately displayed in the 3D window.
Step 4 - display, creating G CODE and send it to Machu Picchu.
Select a postprocessor for your CNC machine
Standard-postprocessor for most popular machines are part of the
send toolpaths directly to Mach3
Prepare machine for adoption G CODE and start working.
