Cut3D was developed to produce 3D models quickly and easily - as much as possible. The software goes logically through the entire process - determining the size of the model will calculate the tool path, cropping project and practically any means to CNC machine.
It is for this is very simple to understand and work with this software is very effective.
Step 1
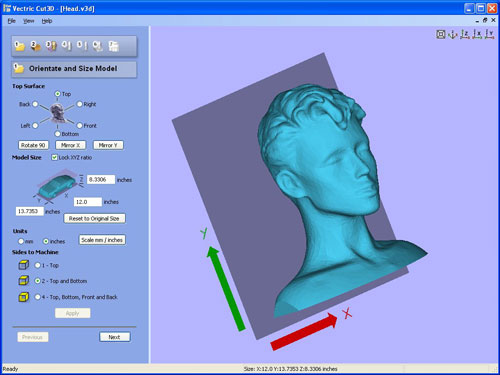
The first step is opening, orientation and size of the 3D model.
Cut3D supports most industry standard 3D file formats.
STL, 3D DXF, 3D, OBJ, WRL, LWO, V3M
ShopBot and MaxNC s
Select the direction, 3D models and large arrows indicate flat XY.
Further specify the size.
Relative size in all 3 axes
Z - the thickness of the model can be entered separately.
Select the number of pages to be cultivated.
Only - 3 axis machining
2 the upper and lower machining
4 pages, top, bottom, right and left side.
3D model, which is great can be done in parts and then merge the individual parts.
Step 2
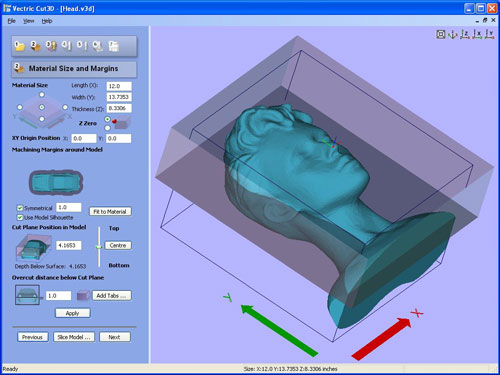
For more information on the determination of material.
The size, thickness and position X0 Y0 Z0 position and
Select the area of machining,
The machine can do the entire rectangle
Limit working inside model silhouette - significantly reduces machine time.
Determine the depth of tillage.
Step 3
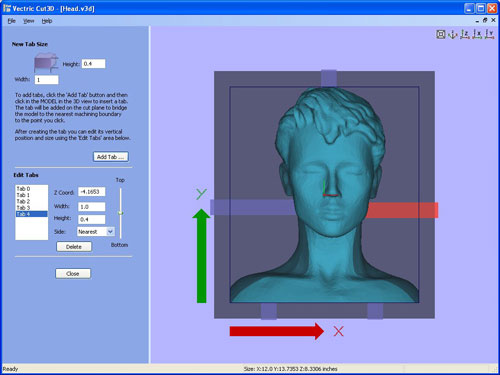
Add the bridges that keep a material model in place. Valid in more sided machining.
Very useful when using 2 or 4 party election machine.
Bridges are very easily around the model simply by clicking in the desired position and then you can adjust the size and position.
Width and thickness
Snap just any party material block
Lift bridges or move down.
Step 4
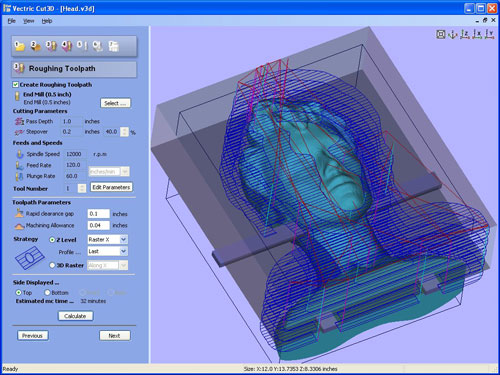
Rough tool path is optional because it is sometimes possible to cultivate a better model for a time with one instrument.
Choose engraving tool for toolpath zdrsňovanú / you can specify your own tools - from my own parameters /
Check the cutting parameters are correct for your machine and material.
Select the type of machinery tracks
Quick and powerful Z
3D raster / gross strategy /
Enter the thickness of material that should remain on the delicate finish - depends on the instruments used.
When the specified number of working-side argument of these are applicable to all parties.
Step 5
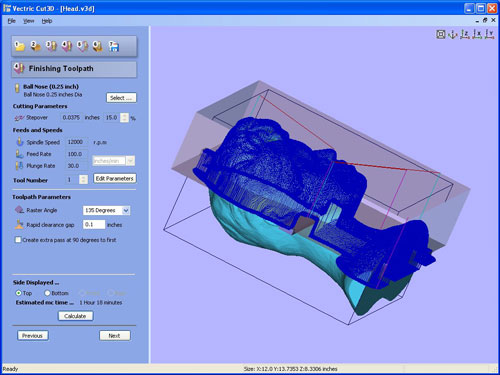
Machined finishing is very quick and easy. simple
Choose engraving tool making workshop database typically rounded tip.
Another tool can be added to the database with the appropriate spindle speeds and feedrates / speed machining /.
Tool path can be specified axes of the machine or 45 / 135 angles.
Final toolpaths are calculated automatically when multi-party working is used.
Estimation of cutting time is shown, allowing to decide what offset tracks or tool to use.
Small stepover gives a better surface quality but more time cutting
Veľký stepover gives a thicker finish faster and cutting time
Step 6
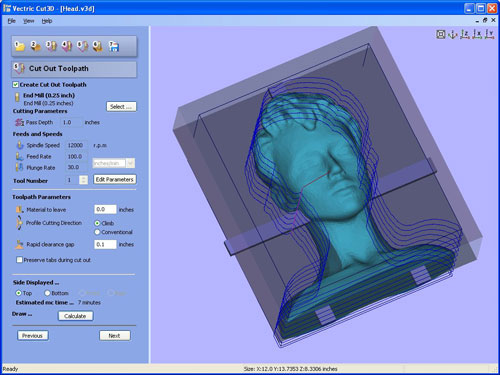
Cut3D automatically calculates the edge of the point where the bridges over the 3D model
Simply select the tool from náraďovéhej database and the software automatically calculates the tool path.
Step7
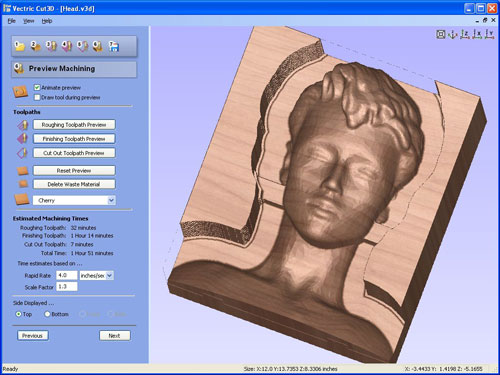
The calculated toolpaths can view and do a preview how it will look at that material.
It shows exactly how cultivated finish work will look
The tool can be revived and will show the work.
Can be represented in various materials
The user chooses from a list of materials
It is an interactive model that allows rotation,
Each set of toolpaths for each side of the model it is possible to look at.
Estimated time for each cutting tool path and the complete work is shown.
Step 8
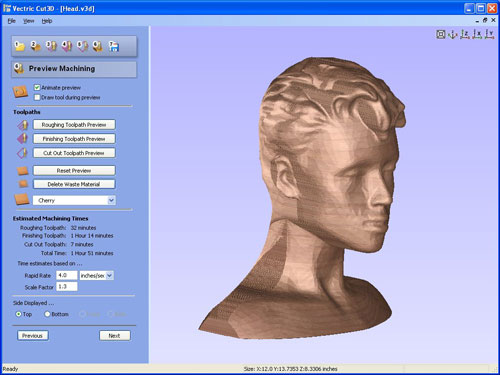
For the 2 sided machining is possible to see the result.
It shows where the model remains marginal
Note-4 pages in machining is necessary to look at it separately.
Step 9

Toolpaths can be saved and calculated for most conventional CNC machines.
Each tool can be run in a separate file.
If the machine has automatic tool change system for all toolpaths can be saved this
The postprocessor is very open and easily editable.
3D models: some links where you can download ready-made 3D models
